
Apollo 11 |
| By Bob Read |
|
|
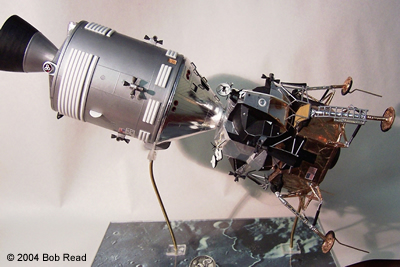
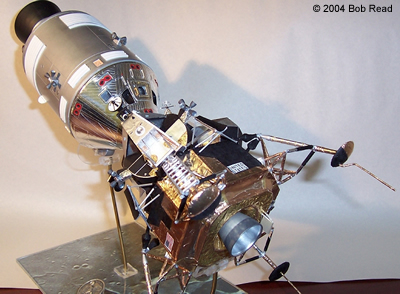
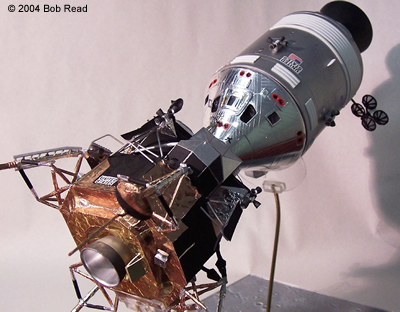
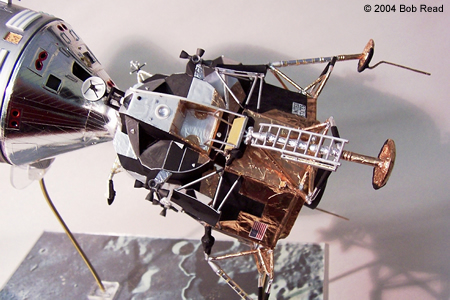
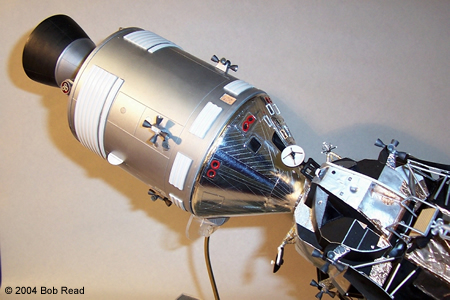
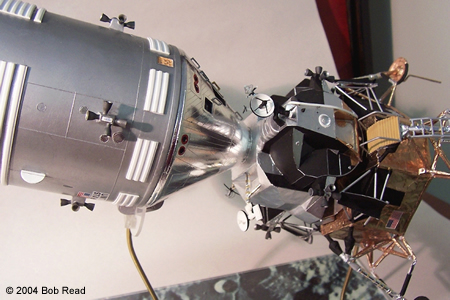
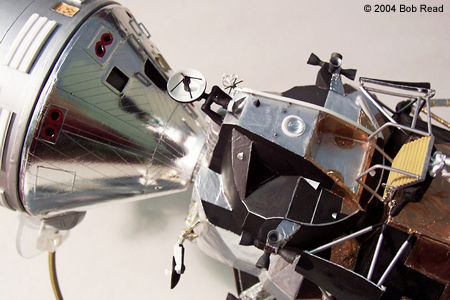
Here's some images of my 1/48th scale Apollo 11. It started out as Revell's Columbia and Eagle stack that included the Space Lunar Adapter (SLA) panels and the Launch Escape System (LES), but I wanted to make an upgraded, accurate and pleasing model of Apollo 11 in lunar orbit just before the Eagle undocked and landed on the moon. There's much more that went into this model than is listed here, but I wanted the photos to speak for themselves. Construction and Modification Highlights Using Revell CSM and Monogram LM as base kits - 1/48th scale Command Module The Command and Service Modules (CSM) were heavily modified to Block II configuration with Evergreen railroad stock for the Service Module radiator panels, scratch building the CM/SM umbilical housing, and completely reworking and carving a new rear bulkhead.The overall size and shape were satisfactory, so most of the modifications required were because of the kit's Block 1 representation: removing kit CSM umbilical and scratchbuilding one in proper location, scratchbuilding new main hatch scratchbuilding EVA handles from thin styrene sheet, removing surface detail and re-scribing panel lines, using bright chrome bare metal foil scribed in strips to replicate the kapton thermal tape coating. Service Module The overall size and shape were also satisfactory but again, the modifications required were because of the kit's Block 1 representation: fabricating new radiator panels from white corrugated railroad stock sheet, scrapping the aft heatshield and fabricating a new one with the correct shape scratchbuilding a complete high-gain antenna assembly decals borrowed from spares for stencilling on RCS quadrants. The SM high gain antenna was scratch built with a donation of black panty-hose from my wife for the antenna mesh. |
|
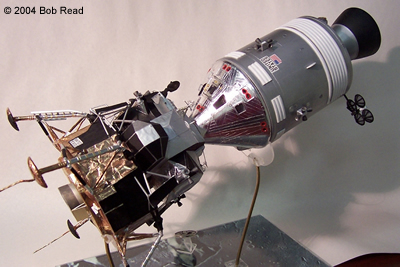
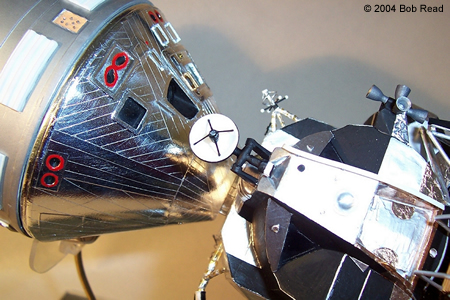
Lunar Module I substituted the LM from Monogram's First Lunar Landing kit as the Revell one was very toy-like. The Monogram one made a much better starting point. I searched the web for images and references on LM-5 to make a more accurate Eagle lander. I added gold shaded candy bar wrapper foil (various flavors made the researching interesting) for the descent stage and kitchen foil for the ascent stage. Many scratch built bits make up the various antennae, exterior lights, docking target and mounting hardware. Ascent Stage Scratchbuild docking window in the overhead, cover aluminium sections with individually cut-to-fit kitchen foil panels (dull side out or shiny side out depending on the desired appearance) to replicate anodized thermal coatings, scratchbuild CM docking target add various small disc shaped bits of kitchen foil covered styrene to simulate vents or lunar surface EVA exterior lights, replace all antennae, radars and comm. dishes with scratchbuilt items Descent Stage Scrap hexagonal "box" structure and construct plastruct frame to replace entire decent stage, cover decent stage panel areas and landing gear with slightly wrinkled gold foil (candy bar wrappers) or flat black painted typing paper (to replicate black thermal foil), scratchbuilt RCS plume shields, scratchbuilt US flag holder on side of ladder (later planted on the moon), thin stretched sprue to replicate the pull handle that Armstrong used as he was descending the ladder to open the access panel and activate the TV camera, scratchbuild landing radar from acrylic block. Image: Another overall view Image: The LEM Image: Command and Service modules Image: The access junction Image: Another view Image: Yet another view |
|