
USS Enterprise |
| By Gil Brumana |
|
|
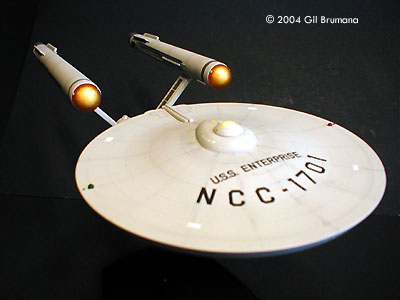
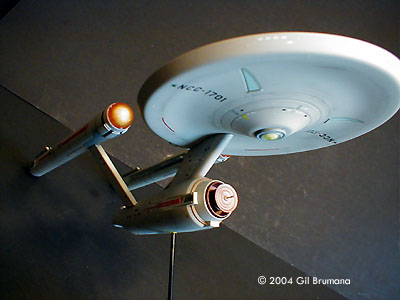
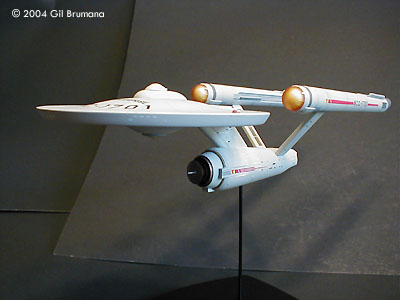
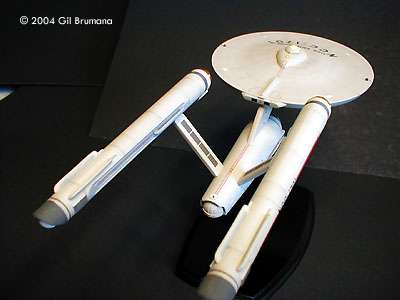
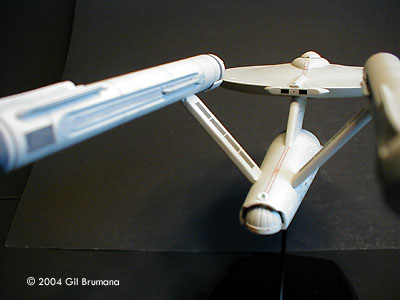
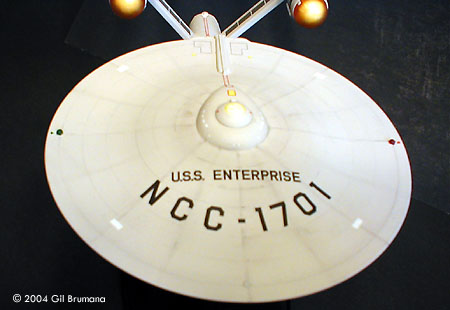
This is the Polar Lights Original Series Enterprise that was built for a friend. This is a great kit, with very accurate dimensions. IF it was just not a snap together... it might not require so much puttying and clean up. But we, as modelers, must do with what we do. The first thing I did was to glue all the parts instead of leaving them as snap togethers. Next was filling seams and joints with glasing putty. (more commonly used for car body shops) This was then sanded to a smooth finsh with 2000 grit wet/dry sand paper. The Polar Lights logo and copy right lettering on the bottom of the primary hull was also sanded off and the area made smooth with the same grit sand paper. Why they had to put that on the outside of the part when it's already on the inside, I'll just never know....... Once everything was sanded and assembled The clear pieces were coated with liquid mask.... (the bussard collectors were painted with Tamiya Clear Orange on the inside, with the inner part painted Pure White) Then the model was sprayed with Krylon Light Grey. (This is the closest I could find to match the original Enterprise in color). After it had dried for approx 3 days, (using a heat lamp part of the time) the masking was removed, the smaller details were painted, then the decals were applied. I used the kit decal sheet, (and I don't mean the stick on ones.... what are we dealing with here..... A TOY??!) The decals are very good. A little on the thick side but very acurrate and conform very well after libral doses of decal set. Once all was done the model was sprayed with Tamiya Dull coat. Several coats were applied to smooth out the thick decals. The last thing that I did was to add the missing lights from the Production version that are not on the kit. There are tiny lights just to the outside of the navigation lights on the top of the primary hull, that match the color on the ones they are next to. There are also three lights, same size, in between the pylons on the secondary hull right in the middle of the stripping. They are, from front of the ship to back, Red/Green/Yellow. I also painted the green, red, and yellow colors inside the Hanger Bay Beacon that sits over the top of the hanger bay at the back of the secondary hull, just like the original. They Enterprise was then weathered using pictures of the original from the Smithonian Institute as a guide. These little guys are fun to build.Image: Between the warp nacelles Image: Weathering |