
USS Excelsior |
| By April Welles |
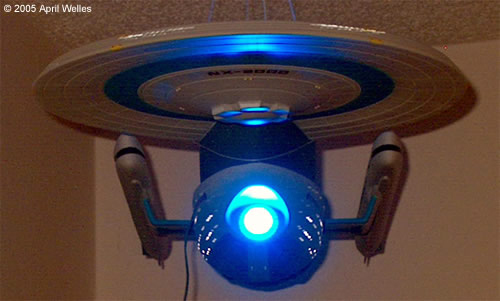
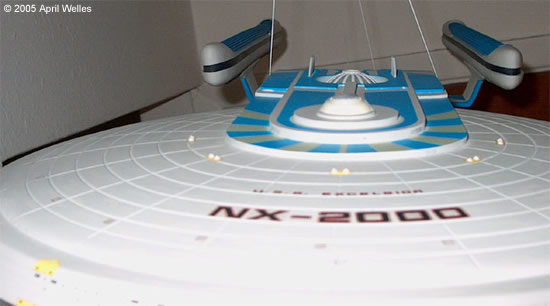
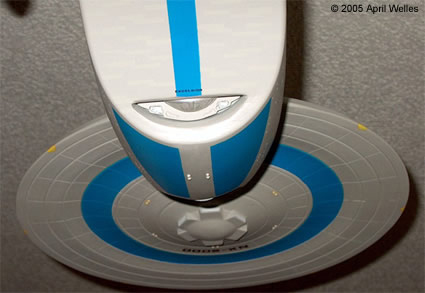
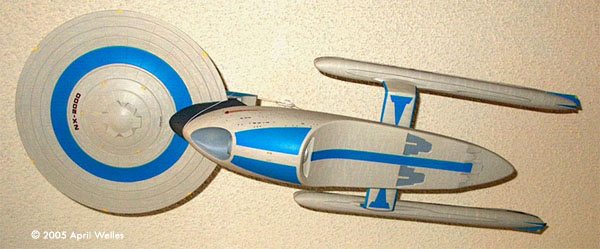
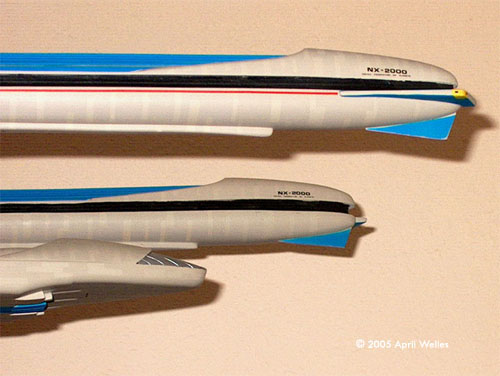
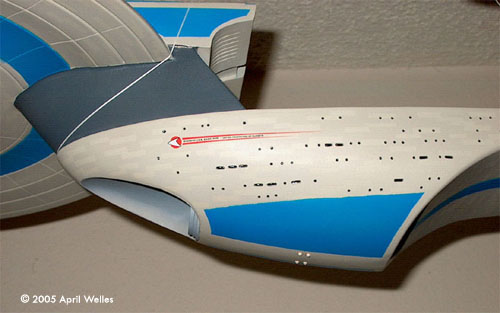
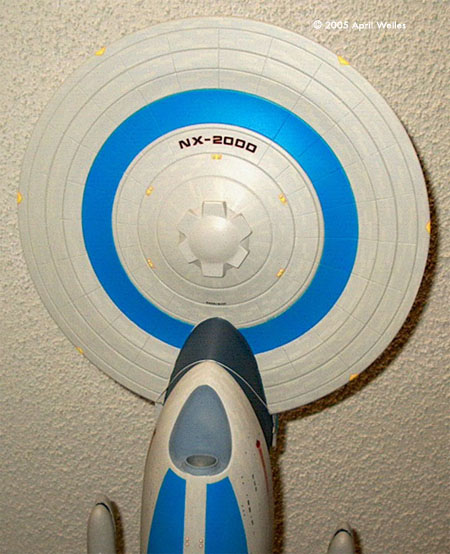
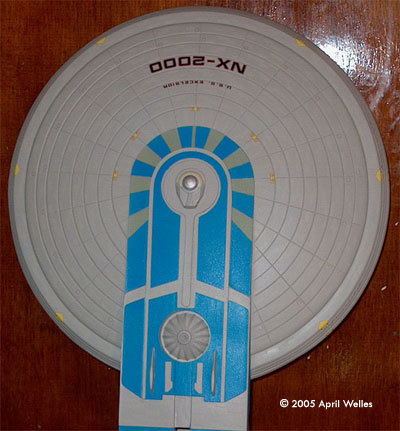
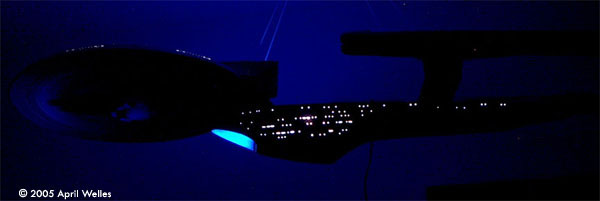
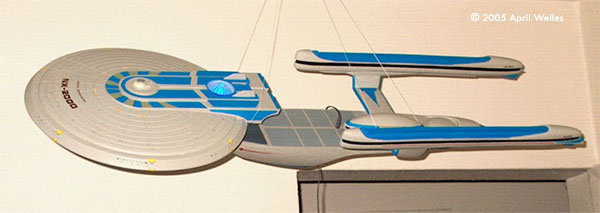 I recently finished a Lunar Models Excelsior for a friend. He asked me to build it and light it - nothing special, just illuminate the windows. The model I was given was already built and filled with Christmas lights. The paint and putty job were very bad, and the windows were just a bunch of holes put in the model. Sort of, kind of, where they are supposed to be but their size was wrong. They were mostly too small except where they were too big. Anyway, this kit is a nightmare. It is incredibly inaccurate. Also, just trying to have the pieces go together properly was a chore. I spent 300 hours trying to get this model to come out looking good. It didn't have the proper number of shield grid lines on the saucer, and the grid was off center anyway. That made trying to center some things impossible. Also they were too deep (but that is a problem with most kits, so I'm not gonna grouse about that too much). The phaser locations were off, too. There are also some strange resin pieces that went in the lower shuttlebay but they weren't correct either (though, the manufacturer probably didn't have access to the lower aft pictures when they mastered the kit). There were many others as well. Suffice it to say, I would probably have had to put an additional 300-500 hours into it to get it accurate. He didn't care about accuracy, he just wanted it to look good. 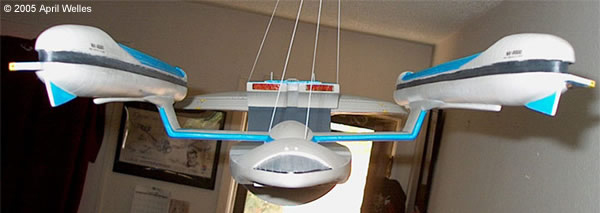 The first thing that I had to do was clean this mess up. (I wish I could find the before pictures I had taken). I then took Evergreen plastic rods and glued them within all of the windows and cut, sanded and puttied them up. I then began looking at reference material for the correct window styles and locations. (That is where the saucer inaccuracies came to play the first time. I couldn't get them in the accurate positions, so I did the best I could). I then took a Sharpie and marked where the windows went and proceeded to drill them out with my pin vice (ugh). At first I was going to build an accurate ship, but then I saw all of the mistakes on it, I gave up on that idea and just went with making it look really good. After I had finished with the windows, I painted the inside of the parts to block 'bleed through' when the lights were lit. Some of the parts that needed to be done had to be cut by the builder themselves. They included a sheet of thick styrene for use with making the upper secondary hull and the warp nacelles. I didn't build a skeletal structure inside the ship, because the Lower hull and the Saucer were formed using very thick and sturdy plastic (one of Lunar's redeeming factors). Once that was done I went on to the lighting. For this, I used Ultra-bright white LEDs as they are the best kind, in my opinion. After getting all of the wiring done in the secondary hull, and testing it, I sealed it. Then I noticed that the windows weren't bright enough. My client was going to display it and have it lit during the day, as well as with interior lighting shining around the model. So I had to go back in and add 6 more Ultra-bright LEDs. Not fun. 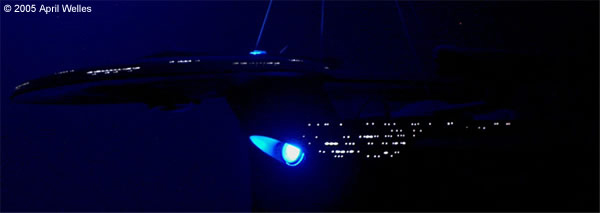 Another problem is the saucer. The lower is larger than the upper. But I made that work in my favor. The biggest problem with the saucer is the 3 lb block of resin used for the A-B-C decks/Impulse engines. It went together okay enough, but there was no way that it was going to stay in one piece attached to the secondary hull, without major structural integrity added. That was where a lot of the time building this went. I don't know what Lunar was thinking when they came up with some of their pieces, but having a 3 lb brick attached to the saucer, and then attached to three pieces of thin, vacuformed plastic (for the dorsal connector), does not seem to be too intelligent. Plus the nacelles are vacuformed with a 2 lb piece of resin on the top for the nacelle grills. Same with the pylons and the pylon connector (the big oval thing) being resin. It makes the model very heavy, and potentially unstable. All I believe is that it wasn't entirely thought out before production. The structural enhancement that I did in the dorsal was to take 3 square brass tubes and insert them into the resin brick, so the the weight was on those and not the vacuformed neck. I also put 2 square brass tubes along the spine of the secondary hull to give it more strength. I then carved square openings in the top of the secondary hull the same size as those attached to the brick and placed the rods about in inch into the secondary hull. Then I 'Zap-a-Gap'ped the hell out of it, and hit it with 'Zip Kicker'. The dorsal itself was also adhered with 'Zap-a-Gap' to strengthen it both on the bottom of the piece as well as around the edge. I didn't bother trying to replicate the ribbing on the dorsal. I decided that I would do that with paint. The painting of the model was unique in the sense that I haven't painted anything this size before. I went through 4 rattle cans of Testors Enamel Camouflage Gray, and 3 bottles of Testors Acrylic Light Gray sprayed through my airbrush. Before I sprayed the Light Gray, I placed masking over the entire model for the hull paneling. I didn't worry about getting the 'Aztec Pattern' on the saucer (mainly since my client said it was fine not to have it). Besides, the model is so inaccurate that placing paneling that looked like Aztec would suffice. The entire model had 2,000 pieces of drafting tape in random sized rectangles (to make it more interesting). I know I put 2,000 on it, because after I airbrushed the Light Gray, I removed them, and I counted each and every one (*whew*). After I removed the masking, I went over the entire model again with the Light Gray to blend the paneling together. Then I painted the details. I used photos from some of my reference books as well as the Internet for the coloration. For the main blue used on the ship, I used Tamiya Sky Blue. It seemed a bit bright to me, but upon looking at the pictures more, I saw that it was indeed a very bright blue being used. For the area around the bridge area (the one with the alternating colors), I used the Sky Blue and Tamiya Light Blue, which, for some reason looks more like a shade of green instead of blue. But the colors worked well. The shuttlebay doors were painted with Testors Acrylic Silver. The Impulse Exhaust was painted with Testors Acrylic White, then Testors Clear Red, and finally Testors Clear Orange, to give them depth and the illusion of being engaged. The nacelle warp grills were painted Testors Acrylic Black. I changed my mind when I came to the dorsal and went with one color Testors Acrylic Dark Ghost Gray. The markings are from spare sheets of JT Graphics mostly. First I sprayed the model with gloss coat. For the Starfleet pennant I used (get this) the pennant from the 1/1000 scale Excelsior kit from AMT. That decal always bugged me as to how huge it was for the model. It turns out that it fits the Lunar Excelsior perfectly. That kit is stated to be either 1/640 or 1/530 (depending on who you speak to. For myself, I go with 1/530). Because the kit did not come with any decals I had to cut out each letter and place them individually. I also used the thrusters from JT Graphics Refit Enterprise decal sheet on the ship, including on the Nacelle ends. Those I had to cut to shape and blend together. I also used that sheet's Phaser markings for the ship. The red stripe along the nacelles is from a sheet of Don Mathy's decals. 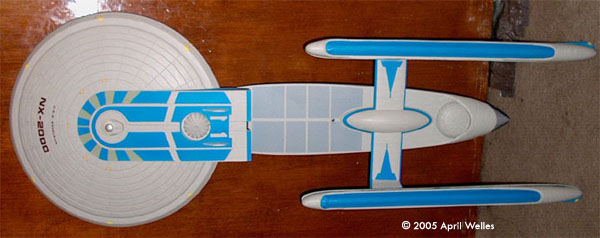 After using the Micro-Set and the Micro-Sol on the decals (and waiting a couple of days) I sprayed the entire model with Testors Dulcoat. While the Dulcoat was drying, I took resin phaser "bumps" made by DLM, and sprayed them with Testors Light Gray. After they dried I painted Testors Acrylic Silver on the tips. Once the model had dried, I used 'Zap-a-Gap' to adhere the phasers to their proper locations (adding two above the shuttlebay. Because it should [otherwise there is no way for them to protect their aft section], and because the Refit 'E' has it. So a more improved ship would too). As I said this model took me about 300 hours to build, and I used all of my own supplies. The decals were my own sheets. I even used the phaser 'bumps' that I was going to use on my own personal project for my friend's model. I did the best that was possible to get this kit to look nice. In the end, he decided he didn't want to pay for it so now it hangs from my ceiling getting many happy looks from me and compliments from guests. Image: Bow on Image: Bridge detail Image: Second hangar Image: Underneath Image: Aft end Image: Secondary hull and neck Image: Under the saucer Image: Saucer, above Image: All lit up Image: Size comparison with ERTL's Reliant |