![[Starship Modeler's 9th on-line modeling contest: The Other Guys]](other_guys.jpg) |
Contest Rules |
HSS-64 Angel Of Mercy |
|
|
|
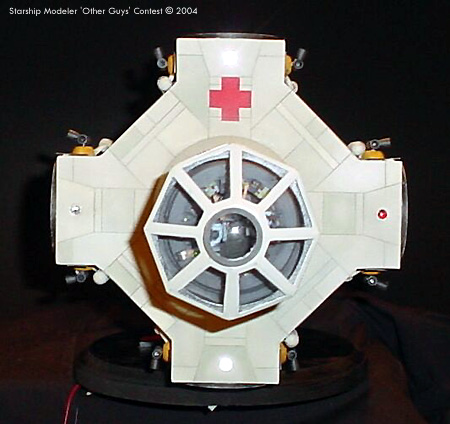
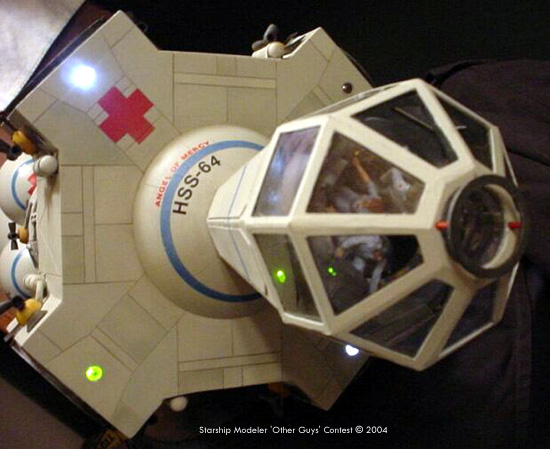
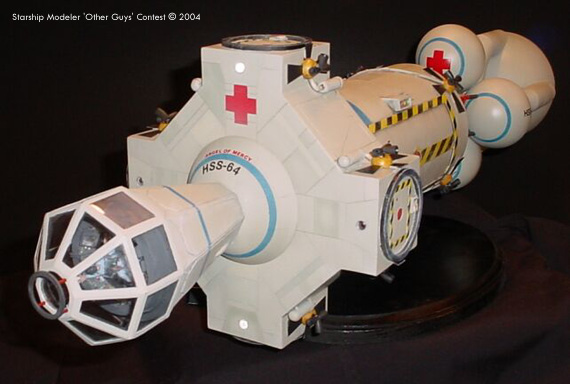
by Brad Guy Scale: 1/48, 8½" x 8½" x 32" (216mm x 216mm x 813mm)In 1987 I made a sketch of what I thought a cis-lunar ambulance would look like. I always liked the design, and when The Other Guys contest was announced, I knew the time had come to build her. Starting with the original sketch, I made a few design changes, then made a master drawing in 1/96 scale. From this, a dozen or so 1/48 detail plans were drawn. Once I knew what I needed, I went off on a hunt for parts. Trips to Home Depot and Hobby Lobby brought various diameters of PVC tubing, acrylic spheres, and assorted doo-dads. I also made a trip to my favorite electronics shop, only to find that alas, they had closed their doors forever. So I made do with Radio Shack, picking up a small fortune in LED's and stuff. My local mom & pop hobby shop provided 1/48 scale carrier deck figures, (the only kit parts used in this model), optic fiber, and about a mile of brass and aluminum tube. For the most part, I built the Angel Of Mercy front to back, starting with the big greenhouse canopy. I knew that the tolerances for the canopy panes had to be pretty tight, or they wouldn't look right when they folded up. So I cut them on a CNC machining center. I generally don't like doing this, it feels like cheating. But in this case I thought it needed it. The rest of the cockpit was built the old fashioned way, hacking up bits of styrene. The control panel was drawn as a series of conic sections, and cut from .010 styrene. The instruments and gauges are lit with green, yellow, and blinking red & green LED's routed thru optic fiber. The video screens were cut from some laser-etched mylar Christmas wrapping. The effect seems perfect for this scale. I re-posed some Fujimi carrier deck figures into sitting positions, and carved their helmets off. I also built little chairs for them. Then I painted them to resemble Bill Cosby, Raquel Welch, and Larry Hagman: Mother, Jugs & Speed!
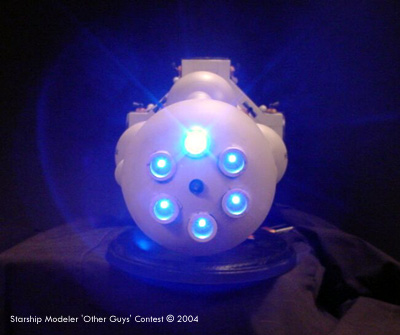
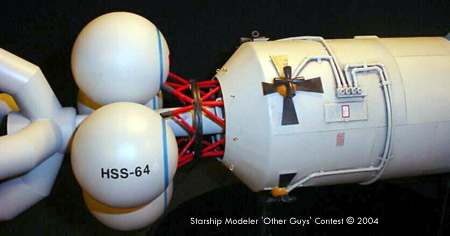
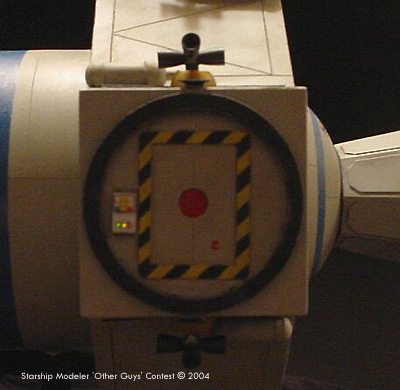
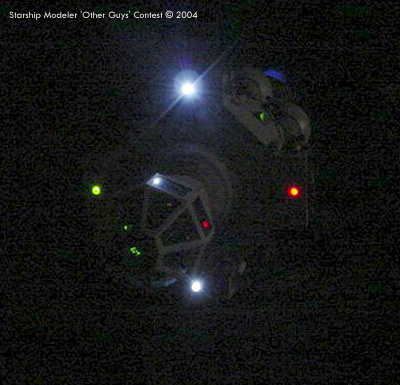
The large, cross shaped section behind the cockpit is the airlock module, featuring four, man sized docking airlocks. It is built from .090 and .040 sheet styrene, with thin sections of PVC pipe, parted off with the lathe, for the mating rings. The manual lock controls are lit with LED's, also routed thru optic fiber. A pair of bright white LED's for headlights, and blinking red and green LED's for running lights round the airlock module out. The headlights and running lights have lens covers made from vacuum formed doll eyes. The main hospital module is made from a piece of 4 ½" PVC sewer pipe. I skinned it with layers of .010 and .040 styrene, and tons of aluminum tubing conduit. The RCS thrusters are elliptical plastic beads, cut around the short axis and hollowed out. This took forever, as there are 40 individual thrusters, in 12 clusters. The tanks are turned aluminum. The tank and conduit brackets are made from .003 aluminum sheet, cut from a Dr. Pepper can. There are three more LED's in the primary, "garage door" airlock status indicator. The conic section at the rear of the hospital module is the flywheel housing. It is .010 styrene, stretched tightly over underlying bulkheads. This allows a subtle, rib like structure to show through, which turned out better than I thought it would. Behind the hospital module are four monopropellant fuel tanks, made from 2 ¾" cast acrylic spheres, with panel lines scribed in. They are linked to the ship with a gantry made from aluminum tube and more thin slices of PVC. The engine module is made from a giant novelty baby rattle. I sliced it in half and installed six high output blue LED's, ported thru PVC exhausts. The injector housings are also made from various diameters of PVC. Once everything was installed, I buttoned the two halves of the sphere back together, and carefully hid the seam with bondo. The last part I built was the little sensor between the exhausts. It is made from brass and aluminum tube, a bead, and a straight pin.
The model was painted in Model Master enamels, both from a spray can and from and airbrush. I washed it and drybrushed it in oils, and sealed it with Future. There are a few decals, pulled from the bottom of my spares box. But most of the lettering is done with dry transfers. This is the most ambitious modeling project I've ever undertaken, and although I'm very happy with the way it turned out, I'm also glad it's over. I think I'll go build a kit now. Image: Bow Image: Endines, doing their thing Image: Detailing Image: Airlock, with indicators Image: Crew Image: Beauty shot Image: Underway |
||
![[Port]](images/scr_18_amb098.jpg)
![[Starboard]](images/scr_18_amb099.jpg)
![[Top]](images/scr_18_amb112.jpg)
This page was last updated 16 January 2004