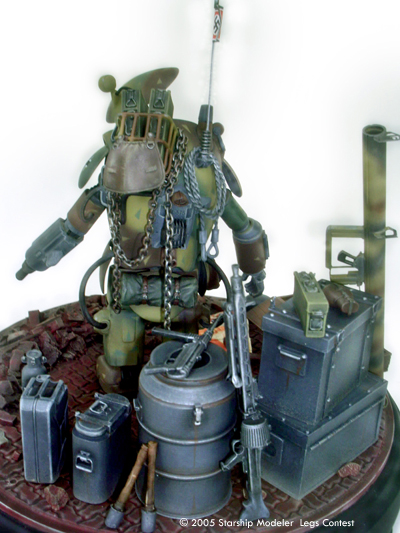
The Accessories
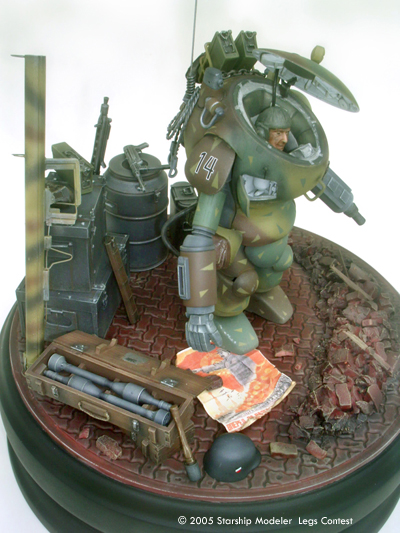
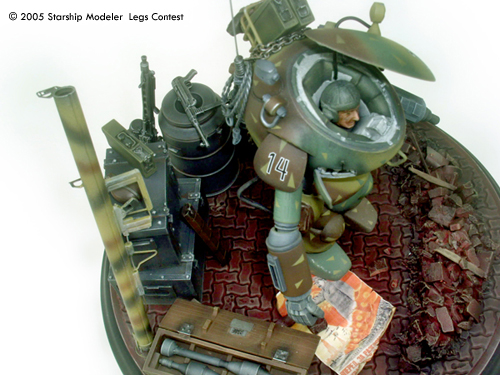
I wanted to place a few ammo cases in the rack of the model. I scratchbuilt and cast several resin copies. I was fairly happy with the results but I decided to see if I could a better aftermarket option. I found exactly what I was looking for with the Verlindedn 120mm (about 1/14 scale) German Ammo and Equipment Boxes (VRL-967). Verlinden-productions.com offers an almost endless supply of aftermarket building options. While at the site I also ordered the impressive 120mm Verlinden Panzerschreck (VRL-691) - a fantastic model all by itself!
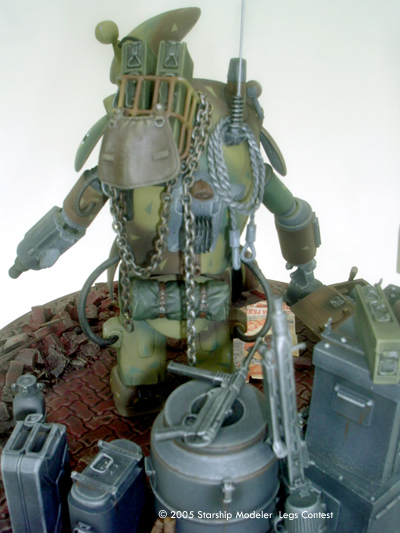
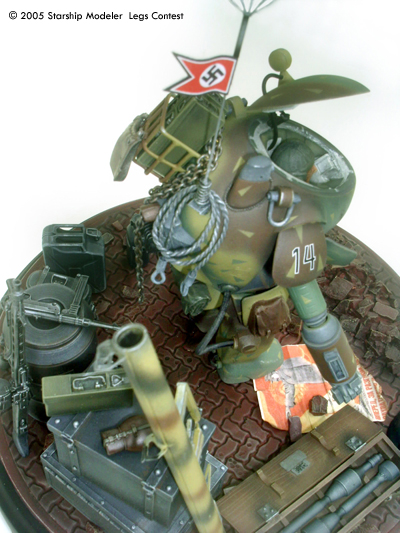
The helmet, canteen, MG42 and MP40 Machine Guns, the jerry can, stick grenades and water tank are from two separate 1/16 scaleTamiya kits. The WWII German Machine Gunner Greatcoat (item# 36306) and WWII Wehrmacht Tank Crewman Aftika Corps (item# 36310).
The Russian propaganda poster reads: "Forwards, let's crushingly defeat the German aggressors and expel them from the borders of our Motherland!" It was copied and reduced with Adobe Photoshop then distressed and finally burned to achieve the well-worn look.
I am especially proud of the rubble. To create this look I purchased a small bag of ceramic mosaic tiles from the local craft store. I wrapped the tiles in a rag and smashed them with a hammer repeatedly until I achieved the desired size and shape. I then placed the debris into a mixture of white glue and water. After emptying the excess watered-down glue, I assembled to rubble pile on a sheet of styrene and left it to dry overnight.
The Base
Mating three 7" wooden clock faces with wood glue and screws, spraying a generous supply of gray primer and filling the seams with resin and filler putty finish the base. The brink is a sheet of styrene produced by Plastruct. Using a bowl from my kitchen, I traced and cut the circular pattern from the styrene. After gluing the pattern in place, I sealed the edges with resin. The bricks needed to show some battle damage. This was achieved with my Dremel using the large engraving bit.
The brick received a base coat of Polly Scale Roof Red (404082) then an oil wash of Grumbacher Academy Ivory Black (T115). After the wash had dried the based was drybrushed Tamiya Buff (XF-57). The lower portion of the base was spray painted flat black.
Final Assembly
After the base was dry I attached the rubble with super glue. The edges were more visible than I had expected so additional work was needed. I used Woodland Scenics' Talus (Rock Debris) soaked in a glue/water mix and with a fine brush, carefully placed the filler around the edges of the rubble. The next morning I touched up the rubble pile and moved on to the accessories.
I had almost as much fun building and painting all the accessories as I did building the MA.K. model! I began arranging the equipment and boxes until I was happy with the layout. The larger pieces were glued directly to the base while the smaller, more fragile pieces were first reinforced with bass wire before attaching them to the base.
Time had come to attach the Kriegbär to the base. I started by drilling two holes into the heels of the model and inserting short pieces of styrene rod. The model was carefully lowered into two corresponding holes in the base.
The top of the radio antenna and open access hatch were the last pieces put in place. The completed diorama received a final coat of Testor's Dull Cote (1260).
Conclusion
This diorama is my best work to date! And though I have been building models for 15 years this work represents many modeling firsts for me including:
- • First diorama
- • First camouflage paint scheme
- • First figure painting (head and face)
- • First time working with aftermarket parts
- • First time working with photo-etched parts
- • First time using an oil wash
- • First time using a white glue and water mixture (applying decals and forming the tow cables)
- • First time using Future
- • First time creating rubble
- • First time creating a paper pennant and poster
I know when I had a question about a specific technique I found this kind of on-line information very useful so I tried to provide as much detail as possible.
Image: Behind
Image: Above/right
Image: Right side
Image: More behind
![[Legs Contest: banner by Gino Dykstra]](legs_banner.jpg)
![[Thanks and Hail! Zog]](zog.gif)
