ENGINE
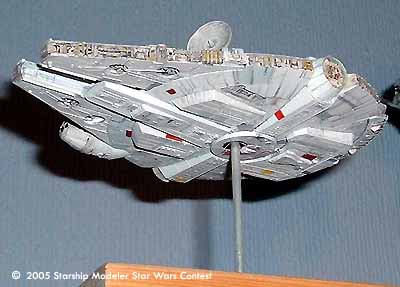
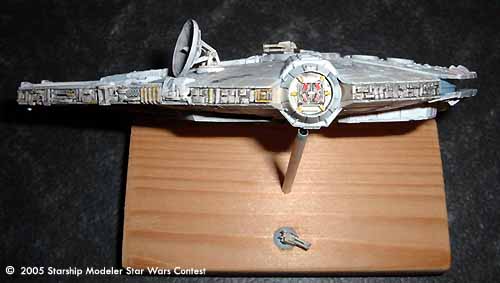
The engine is a strip of grooved Evergreen styrene with a thin strip glued half way along it's length. Grooves were filed between each engine flap to better resemble the studio model. Unfortunately I made my mistake by gluing together each kit half BEFORE painting the engine !
I dug out a very thin brush and carefully painted my engine piece gloss sky-blue; ah well, you live and learn !
COCKPIT
The cockpit doesn't have the side-frames or any detail at the front. I added thin Evergreen strips at the side and then carefully filed them down to blend them in. For the front I drilled a hole to take a 3mm diameter styrene tube, it protrudes by about a millimeter so the front frames can taper up. The bottom half is Milliput shaped to match the taper of the frames.
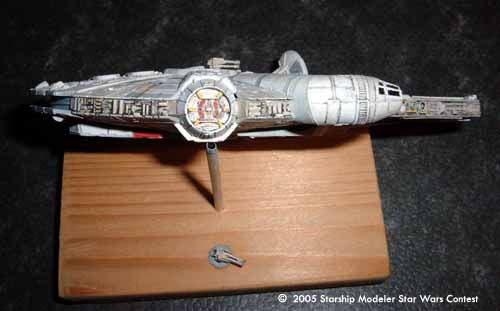
RADAR DISH
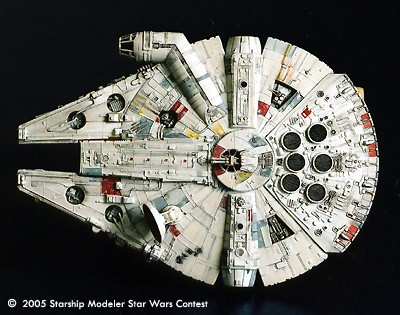
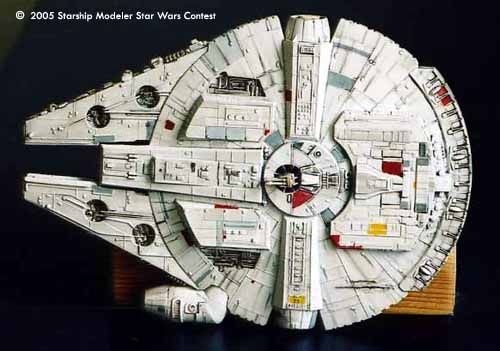
I added a small spike to the centre of the radar dish and filed all the detail off the back. Looking at the back the centre disc is from the spares box, and the 8 ridges are Evergreen strip. The framework is mainly sheet styrene with a thin tube to connect it all together.
I only noticed after I finished the kit that the dish is WAY too big. It needs about 3.5mm taking off the outside edge. Ah well, maybe Lando replaced it with a bigger one after ROTJ, hoping Han wouldn't spot it.
QUAD LASERS
The only way to get these was to scratch them. I made mine from a Tamiya 1/35th scale German Infantry accessory kit. I used the handles from 8 grenades to form the barrels, the rest is all sheet styrene. The bottom guns are detachable so I can display the Falcon.
TOP TURRET
Somehow ERTL managed to mold this bit on backwards, but if you carefully cut round the turret you can remove it with minimal clean-up. Once glued in the correct position I filled any gaps that where left.
EXTRA LANDING GEAR BAYS
I noticed something while doing my research, if I used the existing recessed detail panels as a reference and sized my bays to fit to them, they'd be too narrow. I cut 2 paper templates in the shape of my bays and positioned them until they looked right. From there I could draw the outline of the new detail panels. These were cut open and detailed. The gear bay templates were stuck to sheet styrene and, using Milliput to get the right position, attached to the Falcon.
PAINTING
The fun bit ! The base coat was Halfords plastic car primer (white) then I painted all the coloured panels (grey, red, darker grey, odd bit of yellow) using my reference to get it as accurate as possible. Onto the weathering, this was just washes of thinned Tamiya black of various strengths until I thought it looked just right. I guess the trick is to stop yourself just before your happy with it, because undoing overdone weathering is a lot of hard work.
And there you go, one mini - Falcon, a really fun build !
Image: Underneath
Image: Head on
Image: Port side
Image: Starboard
![[Starship Modeler's 11th On-Line Scale Model Contest: Star Wars]](ssm_starwars_contest_banner.jpg)