by Paul Myhill
Scale: ~1/72
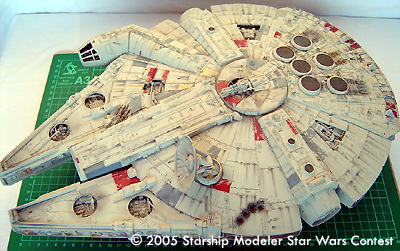
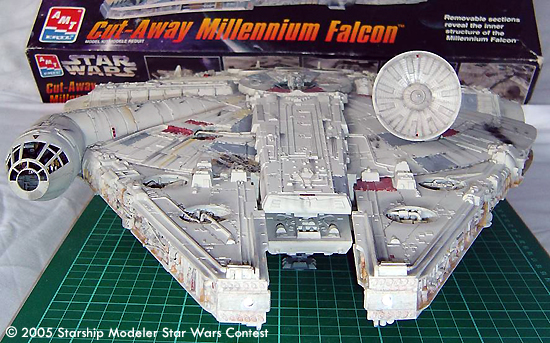
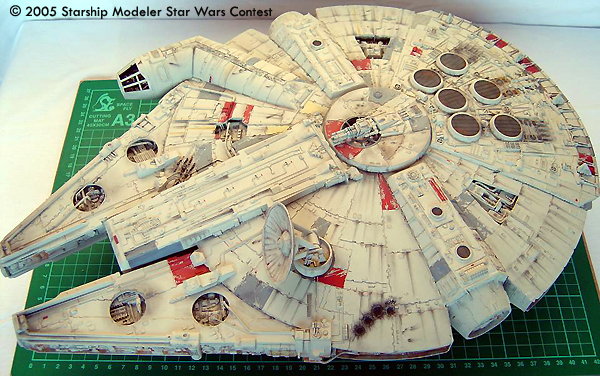
As you can see from the pictures this started life as a cut-away Millennium Falcon kit made by AMT/Ertl.
Because this kit was going to be illuminated and also because of the reduction in height the interior sections were discarded right from the start. Once I had decided that, the next thing was to set about removing nearly all the original mouldings from the top rear section around the six discs. This was done by chiselling away the raised lines and details with a craft knife until there was nothing but smooth grey plastic. Any holes that appeared were filled with putty and then sanded flat. This then provided a near blank canvas onto which copious amounts of styrene sheet and a few kitbashed parts could be added to create a slightly more accurate looking panel. The sidewalls were all trimmed by about a quarter inch and subjected to the same treatment as the rear panel, smoothed flat then more accurate details added again with sheet styrene cut to shape and glued in place.
I decided also to add the two extra landing gear bays on the underside. These were fashioned again with sheet styrene. Firstly I made the rough box shapes and then set about cutting a little here and there until they fitted snugly in place. After the two basic boxes were glued into place I then added the panelling detail using, yep you guessed, more sheet styrene. Adding the two extra bays also meant I had to alter the lower fuselage ‘pits’ by cutting out sections on either side. I always intended to make this kit with the landing gear extended so by adding the two new bays I also had to now scratch two new struts. This gave me to opportunity to junk the existing kit parts for the feet and scratch a full set of new, more accurate ones. I made the new struts with styrene tube of various diameters and retained the kit struts for the front and rear. The ‘discs’ which sit at the bottom of each strut were drilled around the edges. Using a craft knife I then squared out each drill hole very carefully.
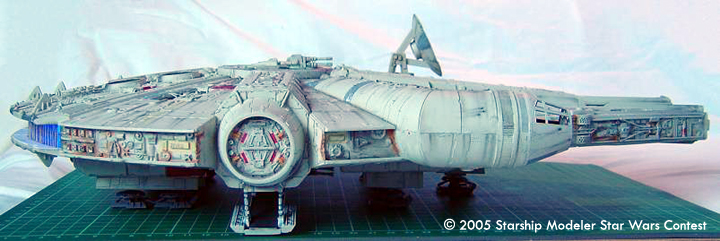
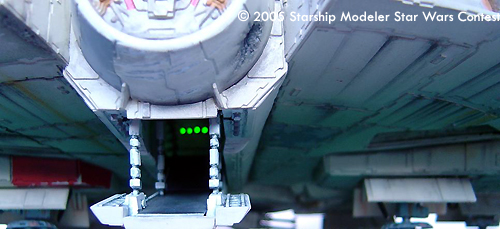
The model is illuminated using LED’s. There are four blue in the rear for the engine glow, two white in the front mandibles for the nav lights, two white in the upper gun bay and two white for the cockpit which feed a number of fibre optics. Now this was originally going to be it, but I then decided to add some extra detail around the boarding ramp and thought it would be a nice touch to have that illuminated as well. So I added an extra white and green LED. All the LED’s are wired in parallel with the appropriate resistors and run from a single 9V battery. The battery and on/off switch are housed in the rear lower fuselage between the landing gear bays. I fashioned a couple of small hinges and a latch so that I could access the battery and switch but still be able to keep everything self contained.
With regard to the boarding ramp, the original kit parts offer zero detail. Because of this and because I was now going to illuminate this area I decided to salvage some of the interior parts I had earlier discarded. I constructed a short section of tunnel, just enough to stay visible from any angle you look into the ramp. I also had to create a small secondary ramp to hide the main ramp hinge and provide a seamless passage. This is just about visible in the photo of the ramp. There are two extra scratch built hydraulic rams and some minor side panel detail added as well. Of the two LED’s lighting up the ramp, the white one just gives some general illumination along the section of tunnel. The green one feeds into several fibre optics glued into holes drilled in the tunnel wall.
![[Starship Modeler's 11th On-Line Scale Model Contest: Star Wars]](ssm_starwars_contest_banner.jpg)
![[Turret]](images/kit_03_turret.JPG)

![[Cockpit]]](images/kit_03_cockpit.JPG)